Platter hub assembly
Okay, I am getting into the territory I am least comfortable in. The platter, being the biggest and, probably, the most precise part of the whole build is... complicated. The end result must be rigid and not only dimensionally accurate, but also very well balanced.
Importance of balance
The balance requirement, although not unique for vertical record players, is definitely more important with them. Due to gravity, unbalanced platter rotating around horizontal axis will "want" to stay in a particular orientation, with its heaviest sector pointing downwards. That means the motor will need to work harder "lifting" that heavy segment upwards half of the revolution, and then will have to use the brakes as that segment rushes downhill after surpassing the summit. That once-per-revolution tug-of-war between the motor and the platter will cause so called "wow effect".
Bits and pieces
At the same time, the platter can not be manufactured as a single piece on a typical 3D printer, which means it needs to be assembled from a number of parts rigidly connected together, which emphasizes all the problems at once!
Due to imperfections in manufacturing process, which cause dimensional differences in sectors of the platter, keeping overall accuracy and -- even more so -- balance within tolerances becomes next to impossible.
Okay, no problem, says an engineer, we'll offset that by adding some during- and post-manufacture adjustability! Yes, sure, sarcastically nods quality control, but what about rigidity then? Production technologist does not add anything to the discussion, they are silently crying in the toilet.
Mass
Standard way of dealing with aforementioned "wow" and not yet mentioned, but equally despised "flutter", is to increase the platter mass. That way we its moment of inertia increases, so it becomes "harder" for it to slow down or speed up, which decreases speed variations.
But we're 3D printing the whole bloody thing! Out of plastic, which is famously not a super dense material.
So, I thought, I will stuff it with either epoxy + sand, or a plaster of paris + PVA mixture. I will experiment with those fillings later, but for now I need to design hollow compartments with exposed infill for additional tensile strength of the resulting composite.
What's the progress so far?
You may see most of it on the image above this post, or its zoomed-and-cut version below:
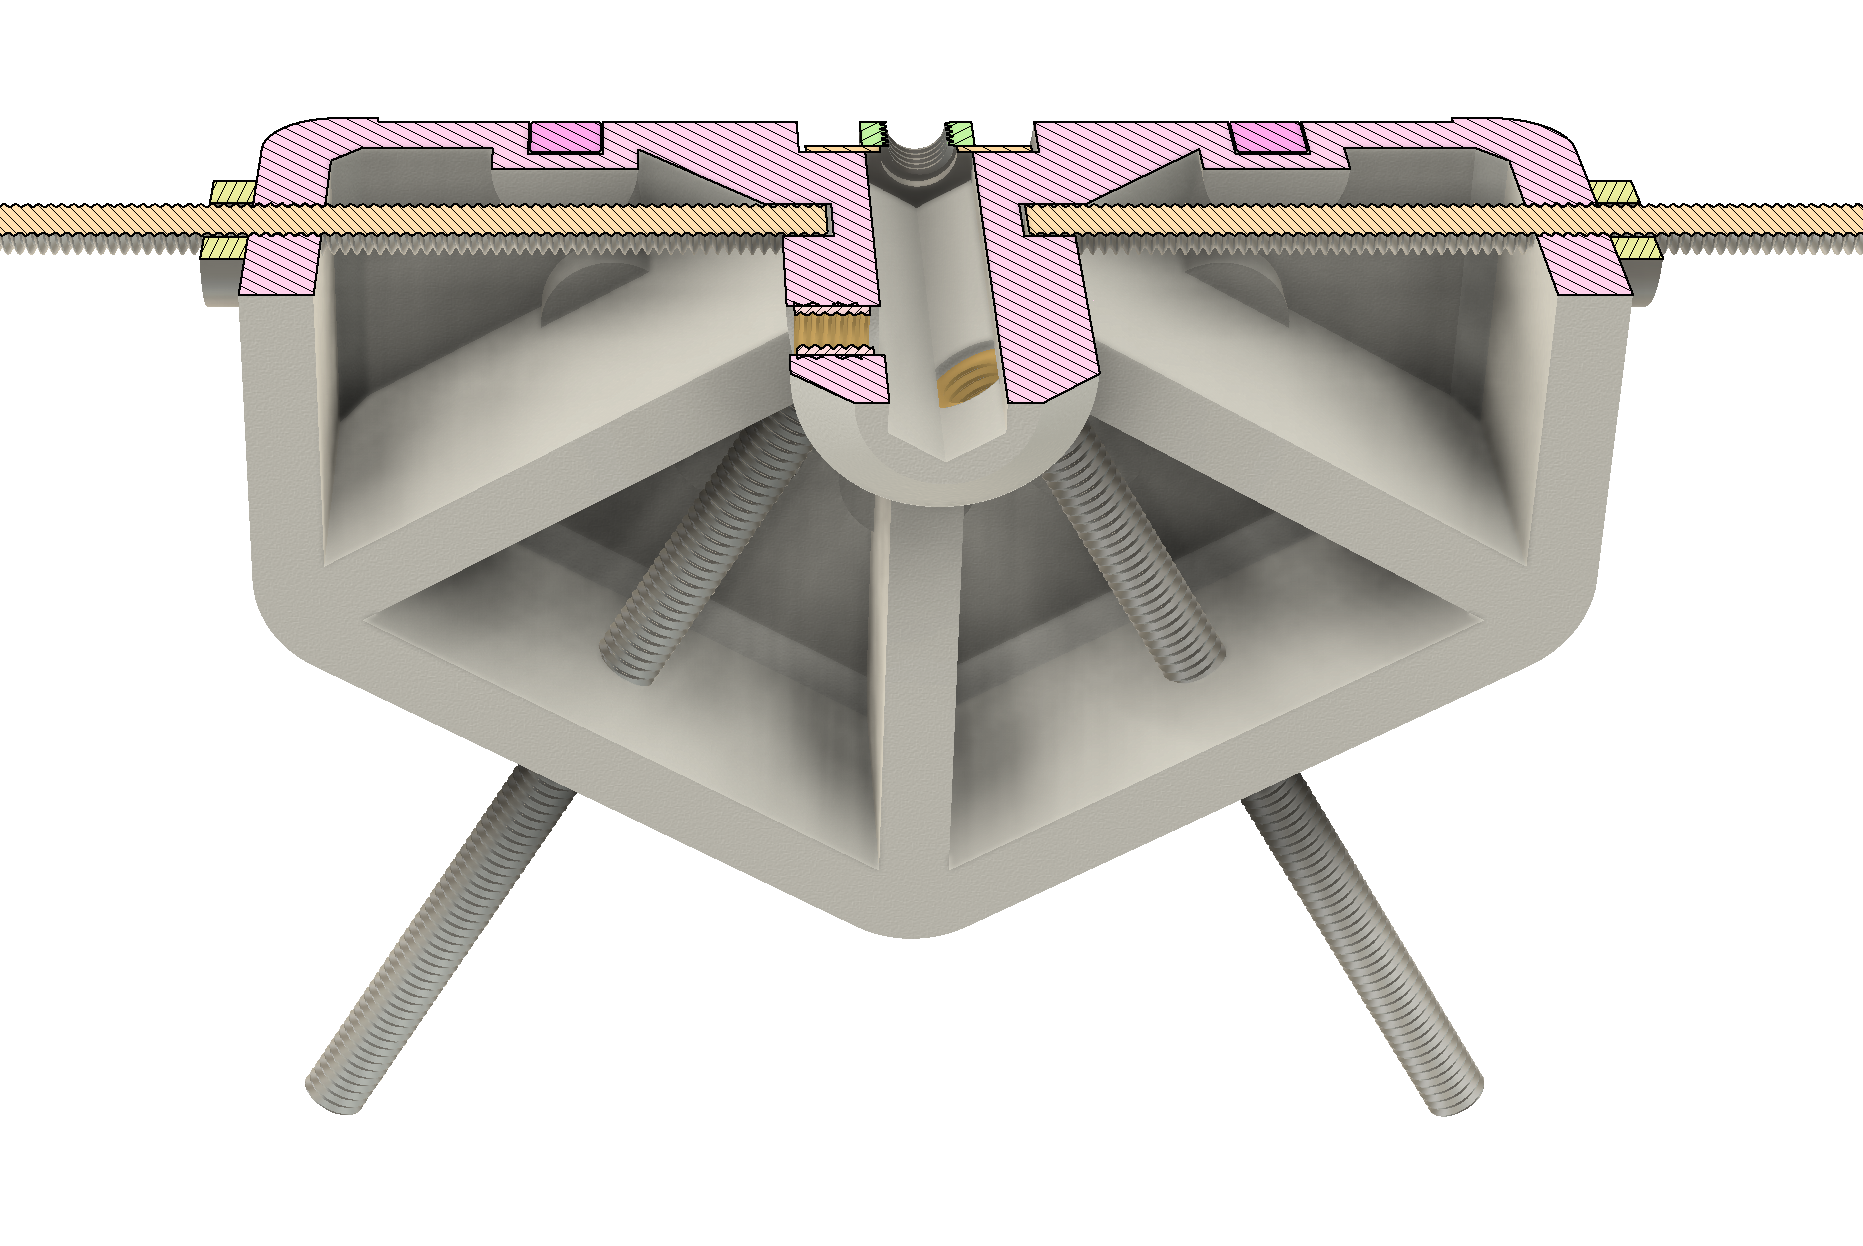
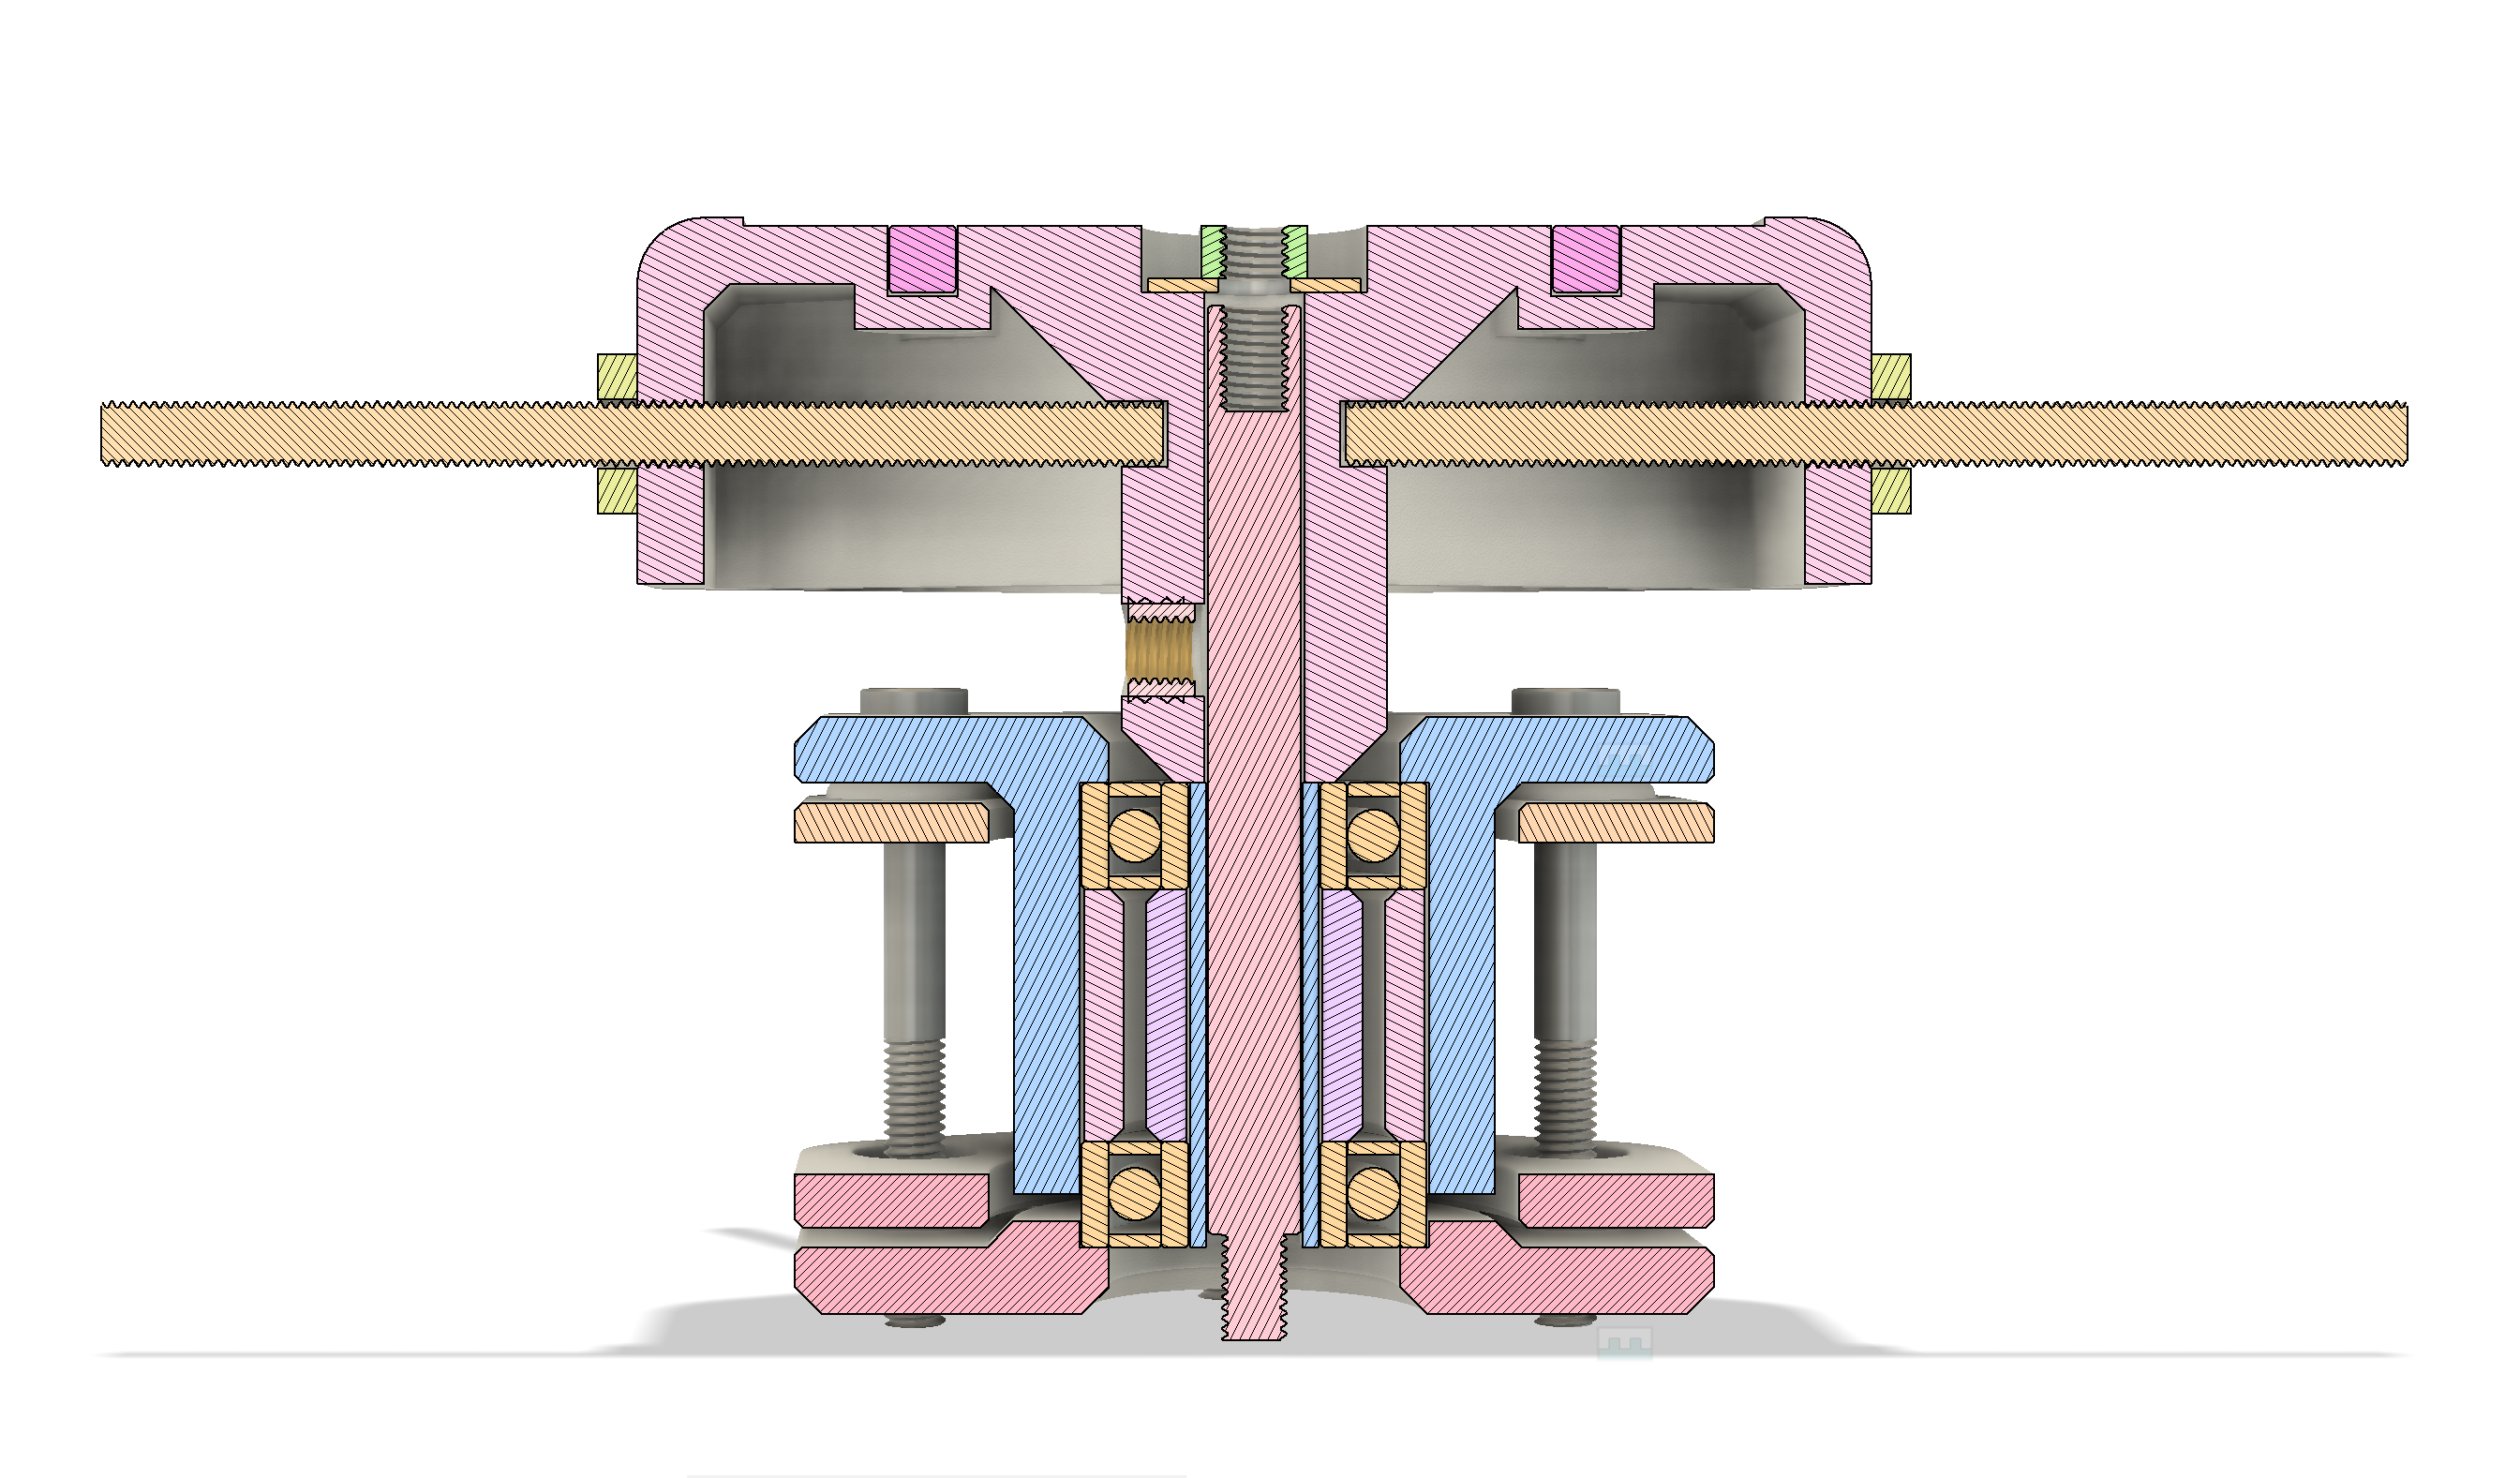
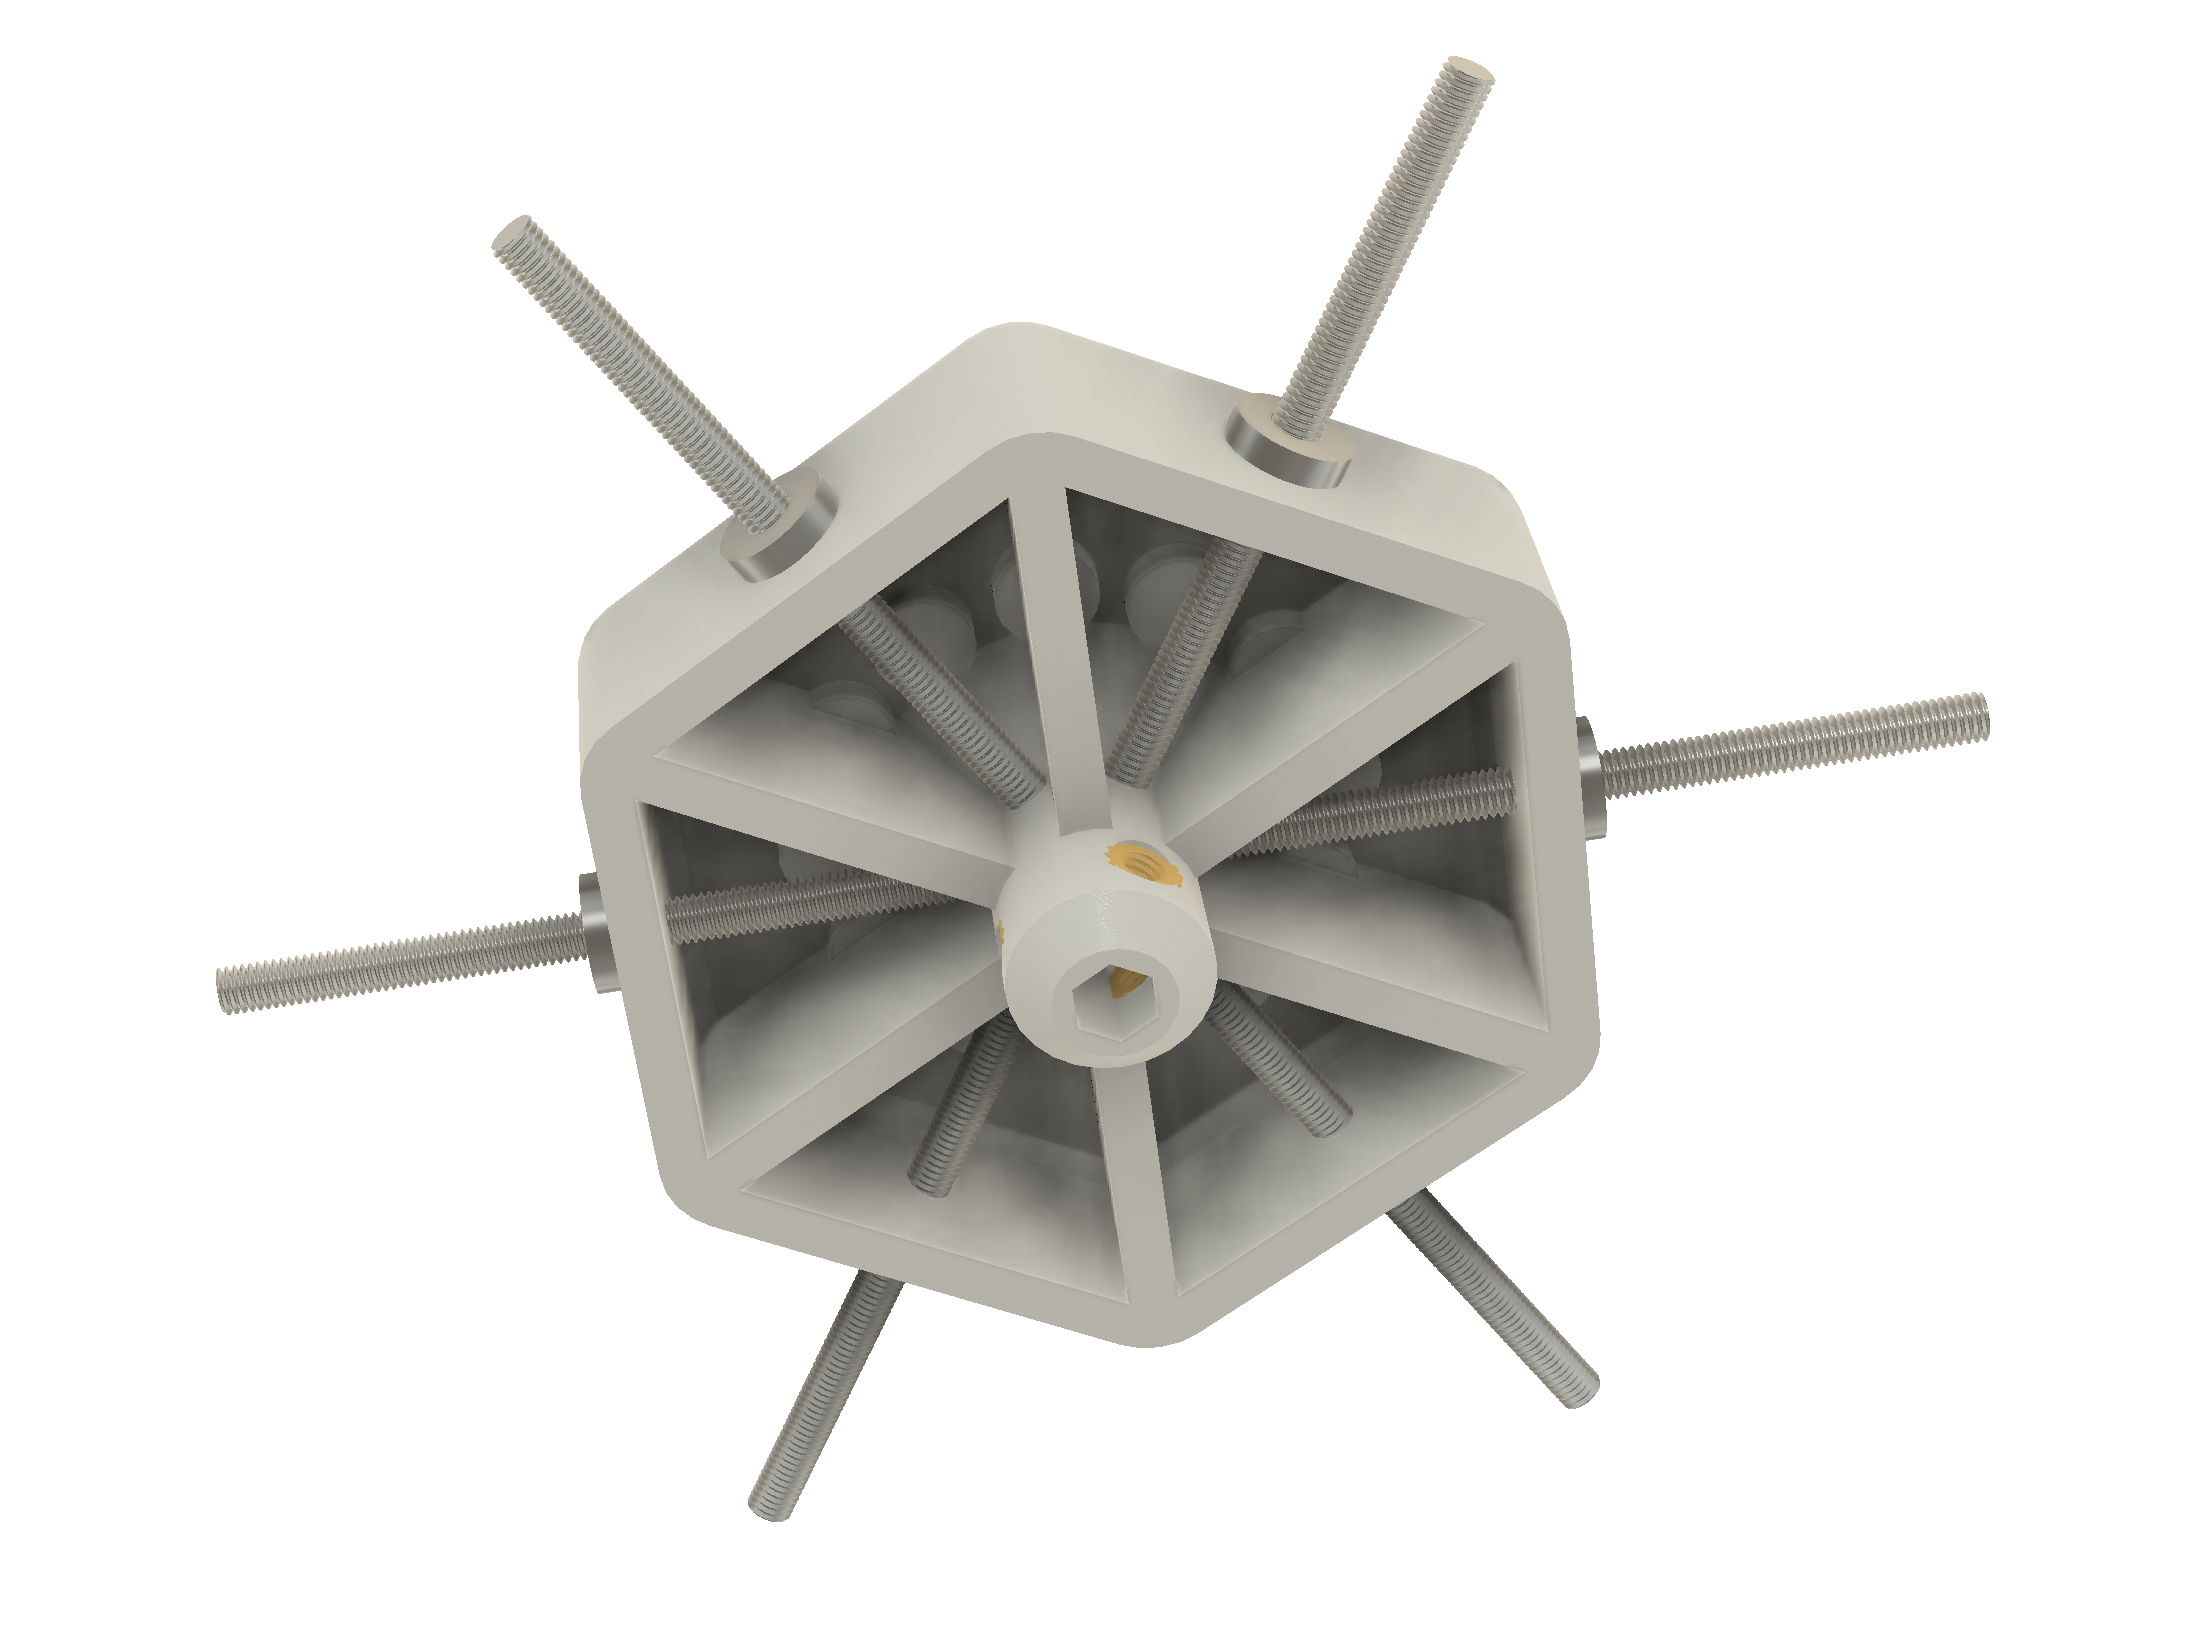
It shows central hub of the platter in its more or less finished state, as seen from the bottom -- or "behind" if we remember that the platter will be mounted vertically. You may see the hollowed-out areas that will be filled with our filler of choice. You may also see the M5 spokes coming six ways -- these will connect the hub to the sectors.
Brass-coloured threaded inserts at the bottom of the axle shaft will be used to adjust the angle of the platter relatively to the shaft during assembly.
Below is the image from the top (or front) side, showing a ring of magnets, which will attract a "record weight" -- a not-yet-designed hexagon-shaped gizmo that will magnetically clamp the records to the platter. We don't want our records flying off our player, do we?
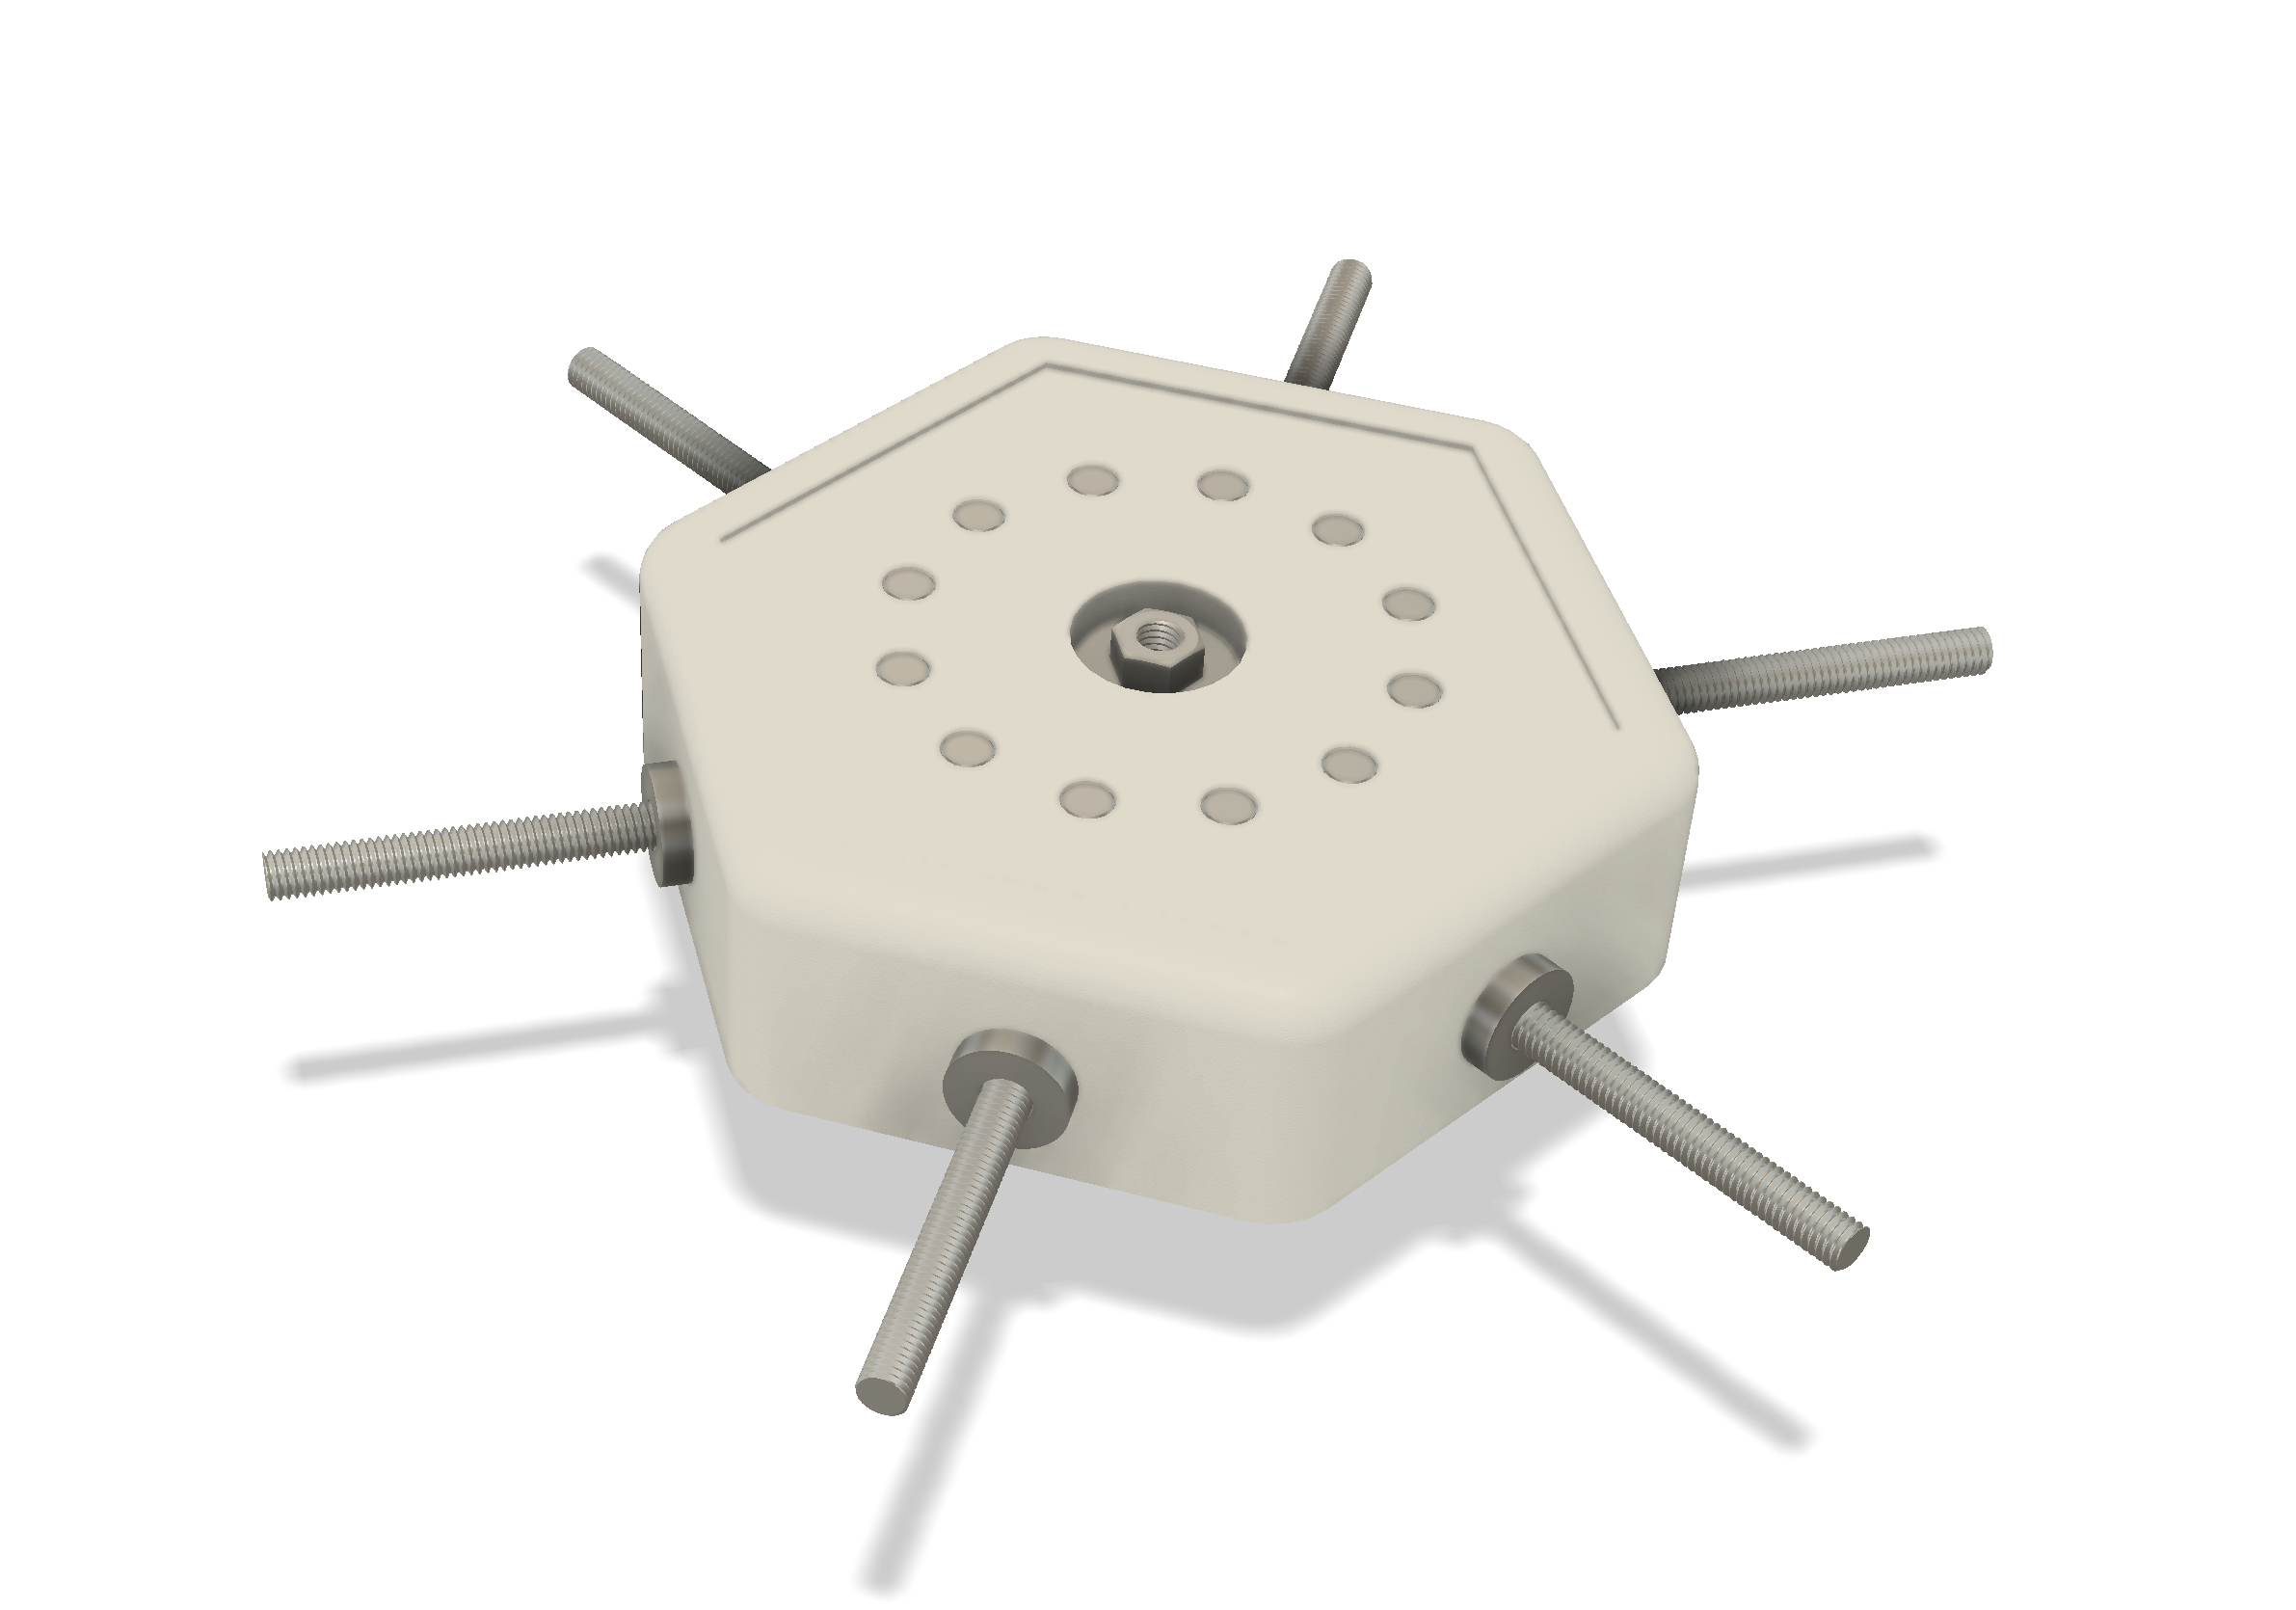
You can also see the nut and the washer connecting the hub to the main axle.
Eagle-eyed among you may notice that there's a recess on the top surface of the hub. That's because the whole thing will be covered with some form of an inlay material protruding above the 3D printed edge -- I am seriously considering leather, but might settle on neoprene or similar. This is to ensure the record is not getting damaged by direct contact with PLA. It will also help hiding some unsightly nuts and bolts.
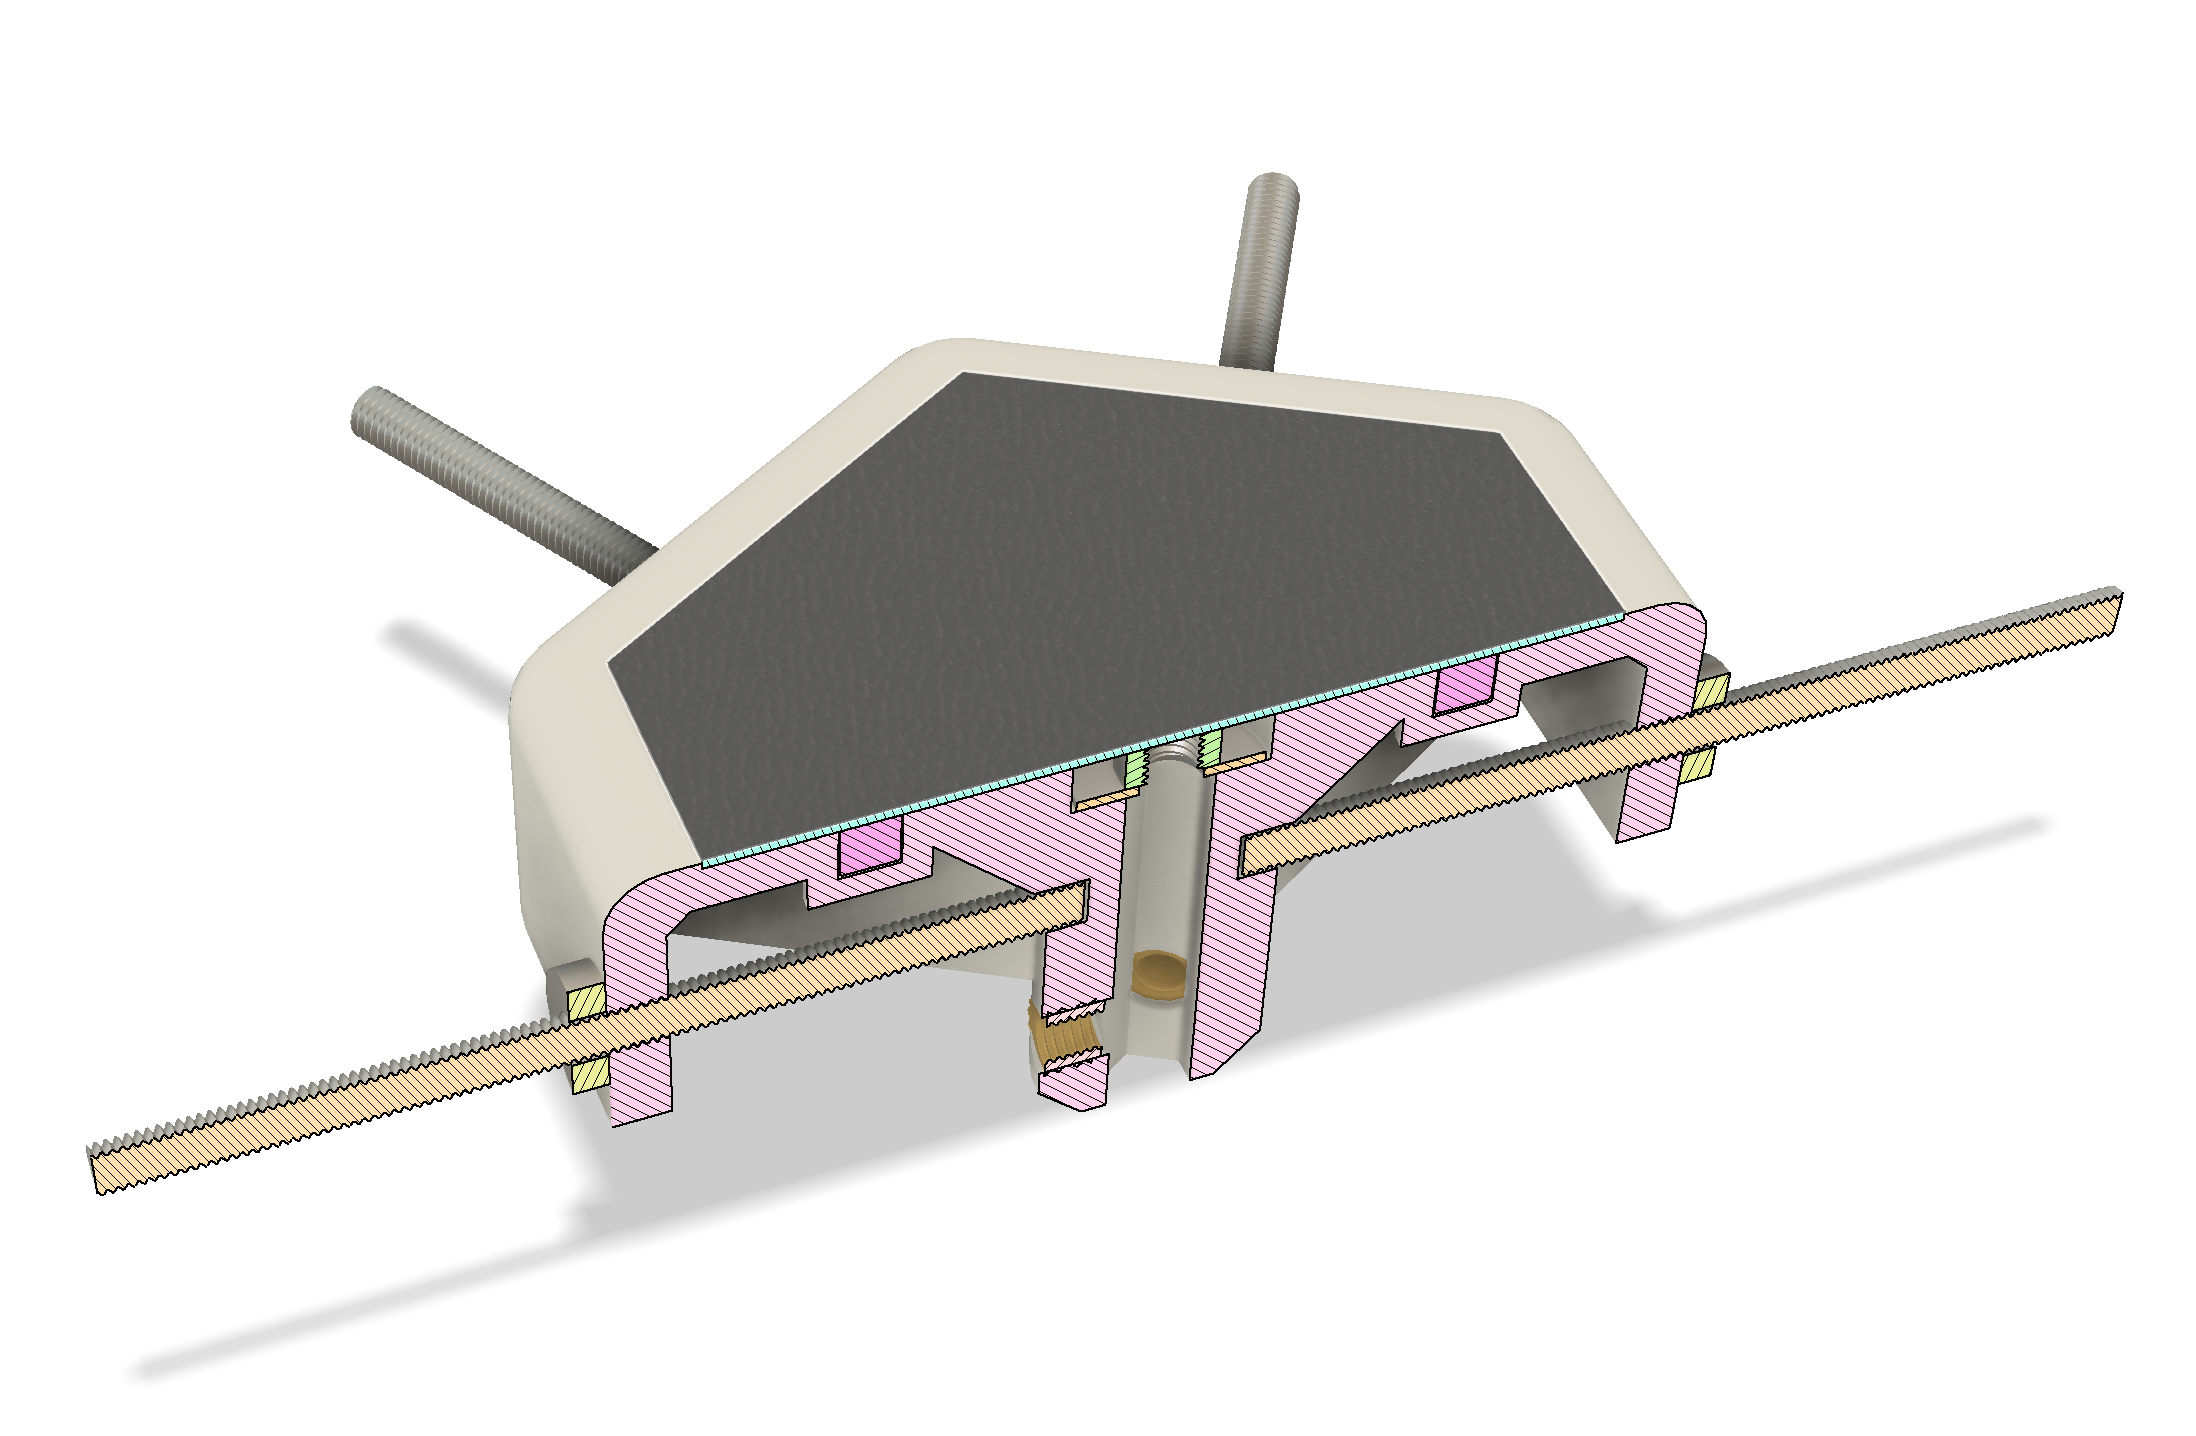
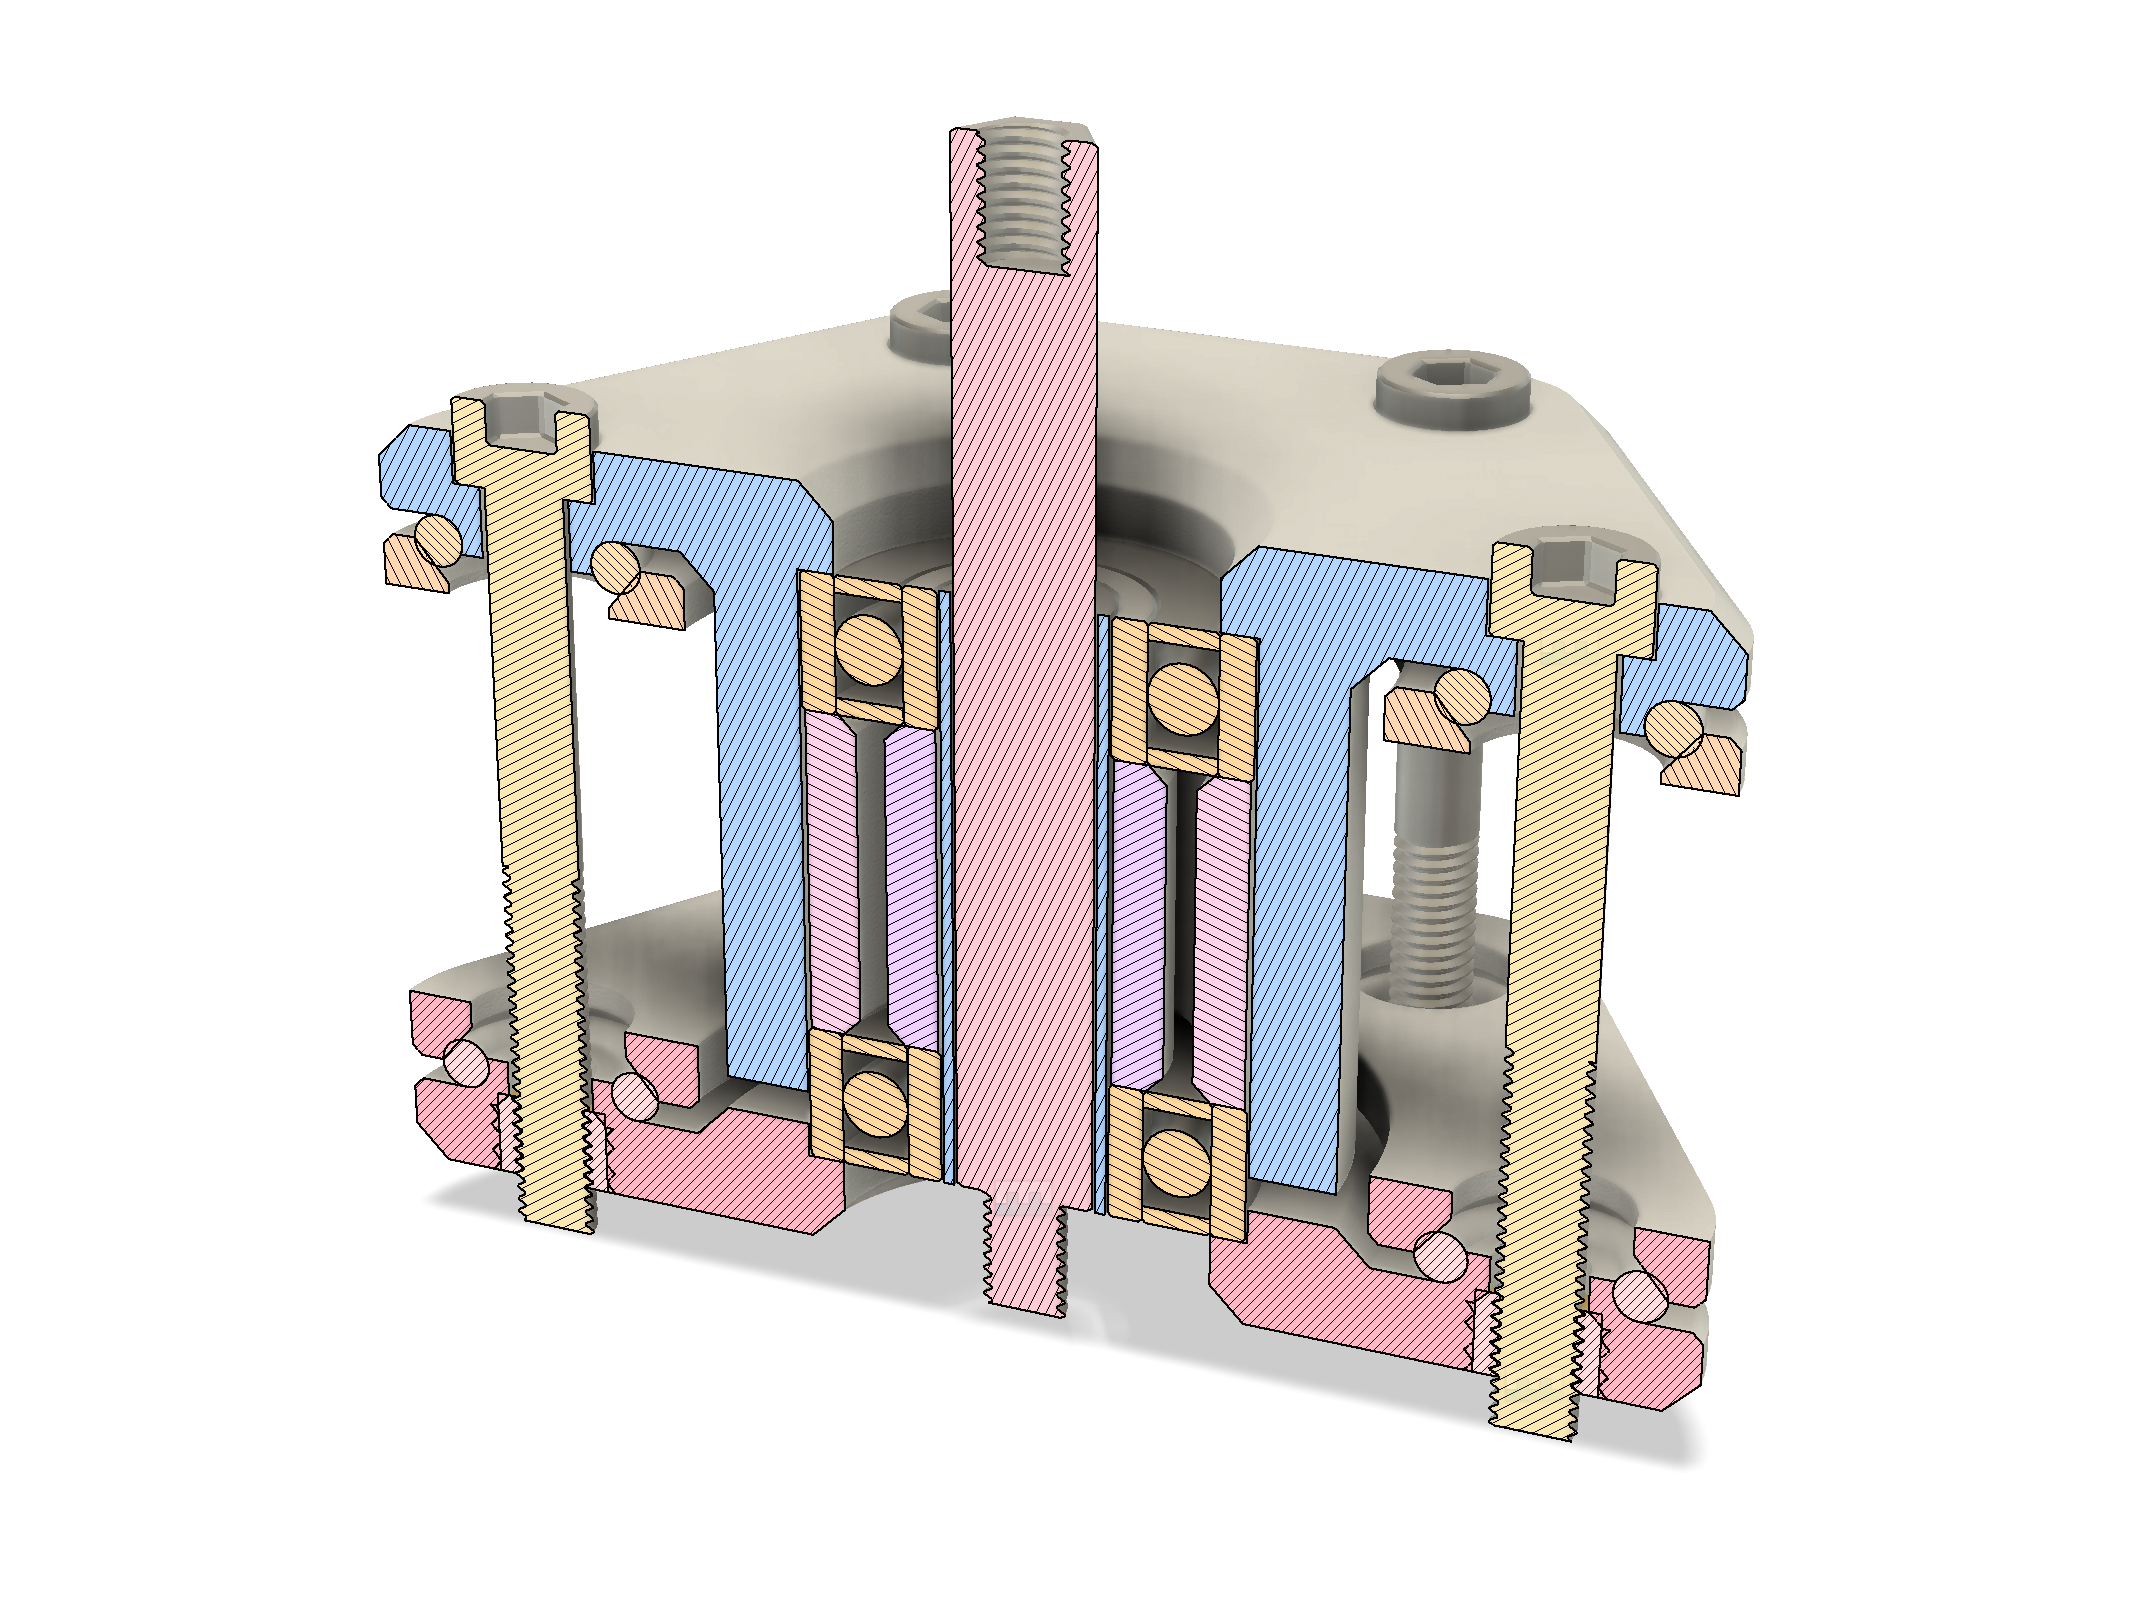
Finally, below is a cross-section of the platter hub together with the bracket and the spindle. This should give you an idea how this whole system will be tensioned.